Wednesday 25 January 2012

Different methods and techniques

This decal has been in discussion with my customer since October. He was looking to get it for his stepfather as a present. He needed 30 of them produced. I gave him my pricing back then and we stayed communicating about it with some minor changes here and there, Last week he finally gave me the go ahead to pull the trigger on it and do them up for him. I set to it and  got all 30 cut on the vinyl cutter. One of the things I've learned when cutting very small letters is to pull the centres out of the letters before weeding the exteriors. The letters will move around on the backer a lot less that way.


 This is a quick glance at what vinyl looks like when it has been cut before weeding the excess waste material.


These letters were less than a third of an inch high. I started removing the excess from the bottom as it was easier this time than going from side to side.


I pull the excess up to about this point on each line and make sure that all of the letters are not coming up with it. Carefully pushing any portions of letters back down onto the backer.


The dot for the i and the apostrophe can be the bane of many a sign shops existence. They have a tendency to  come off on the cutter or lift up with the weeding.


On to the printed and contour cut portion. I put the transfer tape down onto the exhaust system sticker, and squeegee'd it smooth.


And removed it from the backer.


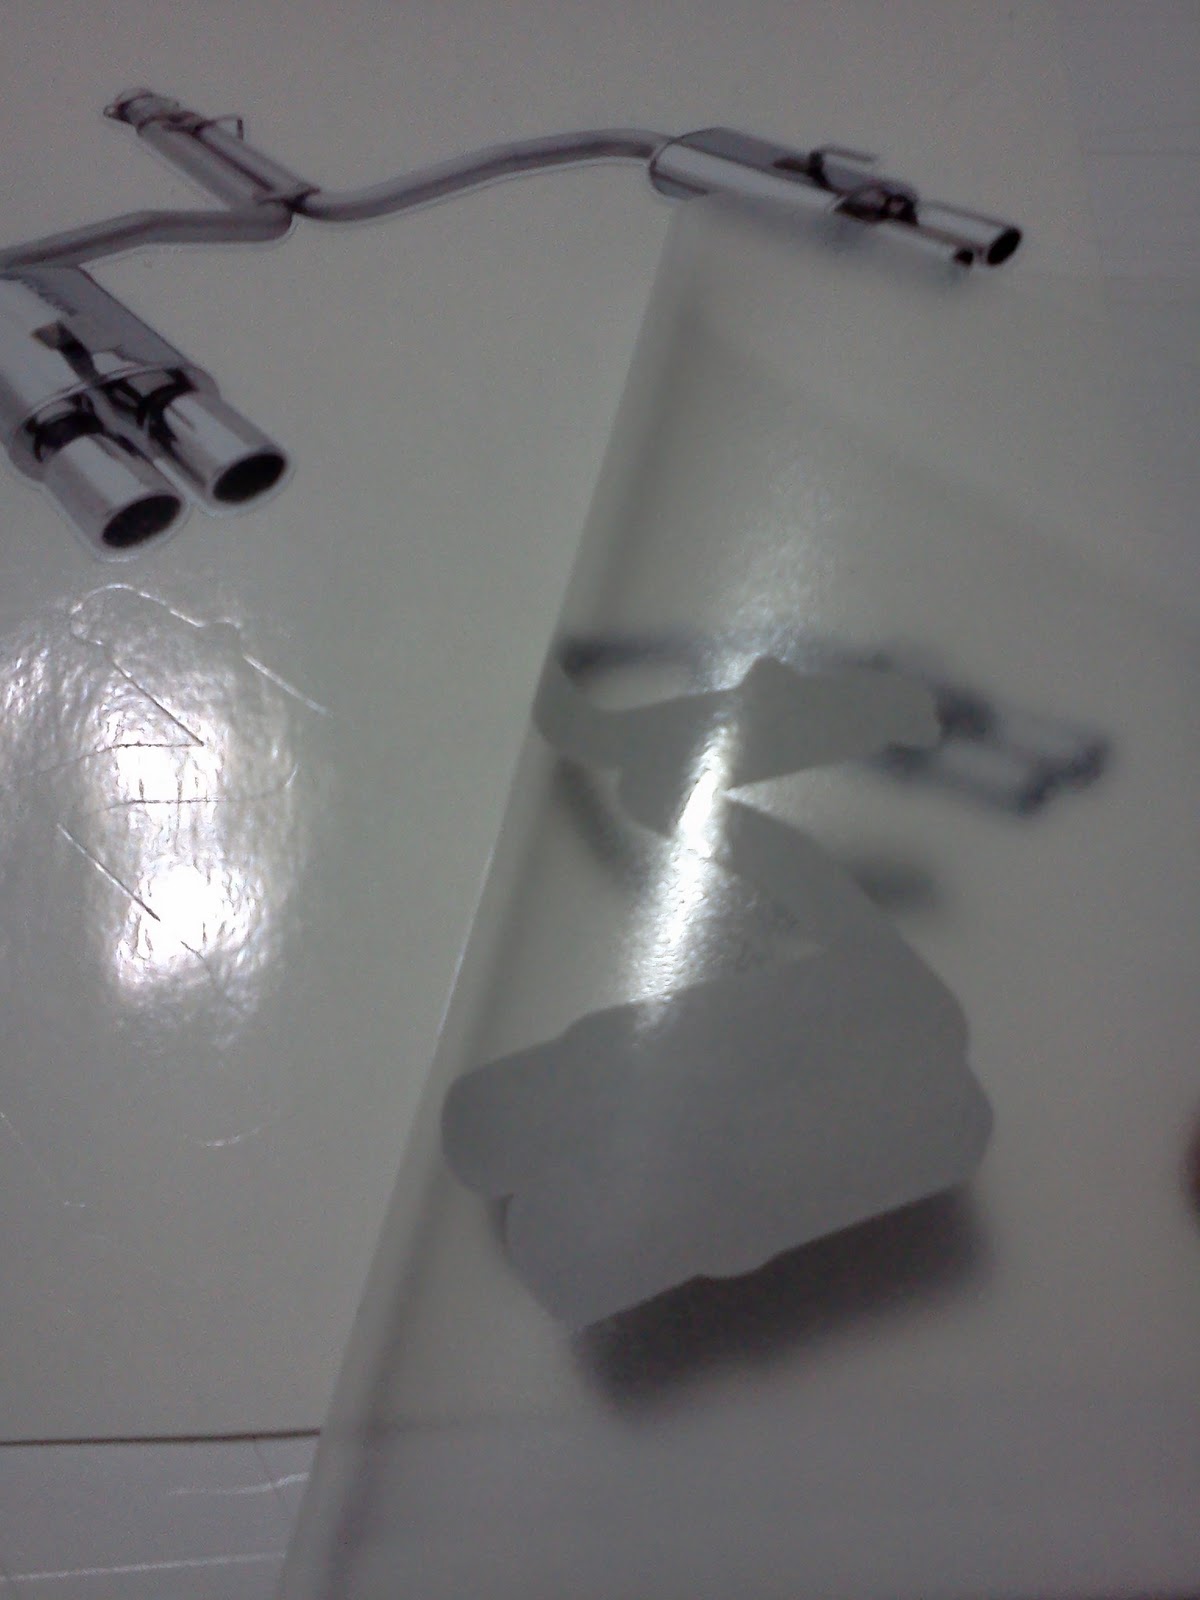
Carefully hovering the exhaust sticker over top of the lettering portion of the graphic, I got it lined up. I removed as much of the static as possible so the vinyl graphic wouldn't inadvertently lift up onto the transfer tape.


When I was happy with the location, I lowered it down into place.


Pressing everything into place with the squeegee to insure the entire graphic lifts smoothly in one try.


Peeling up the back corner to remove the weed border. Because I didn't use registration marks, this was the easiest way to make sure I stayed within the boundary.


Border gone and this is what my customer will receive.


I made up an accompanying video to show how to install this type of decal to achieve the best possible results.


Thank you my friends and always stay creative.

Monday 16 January 2012

Don't quit before the miracle

It's not very often in life when you get the opportunity to meet a celebrity or one of your heroes growing up. On Thursday night of last week I had the pleasure and privilege of meeting Theo Fleury. He's been doing speaking engagements titled "Don't quit before the miracle" and goes into great detail about the fight he waged against drug and alcohol addiction. I messaged Theo on Wednesday when I noticed that he would be down in Toronto at Forest Hill Collegiate doing one of these engagements and thought it would be the perfect time to get him to autograph the guitar I airbrushed for the charity I'm 1in5. He said he would love to do it and would meet with me afterward to sign it. I drove down to the city guitar in hand hoping that I wouldn't be let down not having met Theo personally. I sat through Theo's very moving tale of courage and hope and during the questionaire saw his brother Ted.. I approached Ted and mentioned to him that I was supposed to meet up with Theo after and explained that it had all been arranged previously. The moment of truth. To my astonishment Ted had heard of me and said to follow him up to the stage while Theo was signing autographs. I saw the lineup for signatures and figured oh great, this isn't going to happen. Ted looked at me and said, follow me. He took me right up onto the stage with Theo. I was in awe. Ted leaned over too Theo, tapped him on the shoulder and said that I was there and Theo reached over and shook my hand and said it was a pleasure to meet me. He looked at the guitar and signed it right then and there. I was dumbfounded. I asked if I could get a picture with him and he said when he was done to go backstage with him for the photo. Again, dumbfounded and in awe. I waited for the photo opportunity and the moment came. I had my Mom with me as she is my biggest supporter, and we both went backstage. Theo signed a hockey card for her and I handed off mom the camera and she snapped a couple shots. I took the opportunity to thank Theo so much for everything and with a firm handshake it was done. I saw Ted and thanked him as well. What an awesome individual.


Thank you Theo.

Sunday 8 January 2012

Renewed interest

    While airbrushing the guitar for I'm 1in5, I found myself having a renewed interest in playing guitar. My Charvel by Jackson has been sitting around for ages with no strings and my amp was less than desirable. I went to the music shop and picked up a set of new strings and had it tuned within about 15 minutes. Wow have I forgotten a lot. Well, 1 down, 1 to go. The amp. I was able to strip the amp down to the bare components as I want to make a custom box for it. I had a project in the works for myself design wise for a totally different application altogether but now it is going onto the amp. The history behind the design is a bit of a story unto itself so here goes. I was chatting with my ex wife who I still remain friends with and asked her to send me a picture that she really liked so I could show her that I can take just about any picture and make it into a vector file. She sent me the picture and away I went with it. I really liked it so I saved it to file not really thinking anything of it. A little while ago I did some work with some clear black cast acrylic and I had a bit left over. I was thinking the other day when I came across it in the shop that hey, that file would look awesome carved in this backlit with blue LED's. So away I went and modified the file a bit more to suit my tastes.


    With everything now all figured out vector wise, I needed to draw it up in 3d. With the look I was shooting for, v-carving the project would more than suffice for this one, all of the black would be carved out with a 90 degree v bit. I have a trial version of Aspire by Vectric that I've been learning with and I was quickly able to come up with what I wanted. It also happens that my best friend Jamie over at Oxenham Design is a superstar in the CNC community when it comes to this software in particular. You should really hop over to his blog and check out his work, he is an unbelievable talent. http://fromaspiretobeyond.blogspot.com/


    Everything looks exactly the way I wanted it to look so time to go and see what Jamie was up to for the day. He had the Techno CNC tied up cutting parts for a sign job but the General I-carver was free and clear. The cutting surface for that one is about 15" by 20" so it was perfect. I had to redraw the file on his laptop because the trial version doesn't save toolpaths but it only took a few minutes as I had already done the steps before. After a quick double check by Jamie to make sure depths and speeds were good, we set the cutter up, loaded up the material, and fired it up. You may want to turn the volume down before playing the video. Routering acrylic can be a bit loud.


   After the final pass was completed, there was a bit of cleanup that was required which is normal. All that was required was just dragging the flat edge of an exacto knife across the inner edges to scrape off the burred  material. To bring a crispness to the look, I used a paint brush with lacquer thinner on it to go along the edges to do a final cleanup. Doing this creates a smoother surface that is more in line with the rest of the glossy area. A quick cleanup with some Goo Gone and a buffing with a dry rag and it's all done.


    The next step will be building the custom box for the amp and setting in the blue LED's. This will sit in front of the speakers with a half inch gap to allow for air travel.

Stay creative my friends.


Monday 2 January 2012

A new year and reflections of the past

Relaxing with my friends and family and reflecting on the previous years events during the Christmas Holidays is one of my favourite things to do. Being that the blog was released this year, I thought that I would reflect back further with some of my previous favourite works. Here is a small sample of my favourite jobs. Not always for the result but for the background story behind it.


Thank you all and all the best in the upcoming year. Stay creative my friends.